The weather is getting warmer, the birds are beginning to sing their happy songs, and the fish are starting to jump through the no-longer-frozen waters. Do you know what time is now? Well, it’s time to take your boat out of storage.
However, you can’t just turn the keys into the ignition and set on the water; you need to properly de-winterize the boat first. This way, you will make sure that the boat won’t break down within your first five minutes of happiness. Here is what you will have to do.
1. Take Off the Tarp
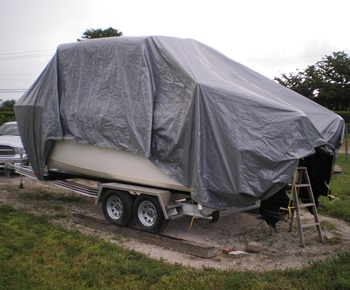
 Before anything else, the first thing that you need to do is take off the boat cover – that is, in the hopes that you did cover up your boat before winter came. If you didn’t, you might just have to clean three months’ worth of grime and dust.
Plus, if you are very unlucky, you might find yourself with a couple of unwanted visitors (for example, rodents, birds, or even snakes). The cover will make sure that your boat will be protected from any outside elements, even as the boat is in storage.
2. Check the Engine
You may not be an expert in de-winterizing boats (yet), but even beginners know that the first thing you should do is to check the engine. If it’s been off for a particularly long time, then it is quite obvious that it may need some mending.
When you check the engine, you first need to take a look at the oil and see whether it needs a change or not. Even if you changed the oil during the winterization process, the chances are that you might need to do it again. You might also want to check the overdrive. If it is not in order, then you won’t be able to start the engine without it breaking down.
At this point, you should not forget to change the oil filter. Also, when adding the oil additive, add the correct one for your engine. This way, it should remain free of corrosion and clean.
3. Refill the Cooling System
Before putting your boat away for the winter, the chances are that you drained the cooling system. This might not always be necessary with the right antifreeze – but in most cases, it is better to be safe than sorry. That being said, if you ended up draining your cooling system to prevent the coolant line from freezing, then you might want to refill it at this point.
Before refilling and checking the cooling system for cracks and holes, you might not want to forget the strainer. That one needs emptying as well. Once everything appears to be in good shape, you may refill the system. However, you may want to double-check that the rubber impeller is not cracked as well.
4. Check the Thermostats and the Water Pumps
Every 200 hours, you will have to replace the water pump from your impeller. With your boat in storage, imagine the state that the water pump is in right now. This rubber part is very important, as it keeps the water flowing down – cooling down your engine. Therefore, if you find that it needs replacing, then do it.
You also need to consider the thermostat. This part regulates the temperature of the water – and if it’s not working right, then you might find yourself with an engine that gets either too cold or too hot. Just like with the water pump, this one needs to be replaced after you have used it for 200 hours.
5. Check the Hoses and Cables
Your boat’s hoses and cables will certainly go through some wear and tear after the years go by. That being said, rubber (from which they are made) is particularly sensitive to cold weather, which might cause them to stiffen and break down.
This is why, when you are de-winterizing your boat, it’s always recommended that you check the hoses and cables. Make sure there aren’t any holes and cracks in them and be certain that they are tight and secure. This should be part of standard boat maintenance, but you must be particularly careful with this as you are de-winterizing the boat.
6. Check the Battery
As you are de-winterizing your boat, you should also go for a battery check. At this point, you must include a topping off of every fluid. Ideally, you may want to use distilled water, as it can prevent any imperfections from getting into the battery.
Check the volts, along with the amps of your boat’s battery using a battery tester. If the battery can’t hold the charge, then it’s a clear sign that you will need to replace it. However, if it’s still in good shape, you might want to focus your attention on any potential corrosion around the battery terminals. Once everything is set, attach it to the cables.
Checking your battery before you use the boat is necessary for all circumstances. If you don’t do it, you might just end up stranded on the water with your boat, with no means of getting back to shore (aside from a potential set of paddles).
7. Check the Fuel System
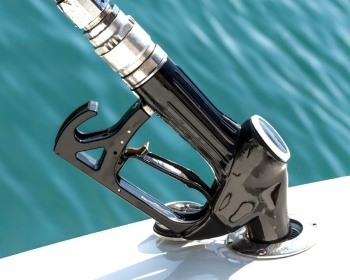
 During winter, the chances are that your fuel tank was filled to the max with gas and fuel stabilizer. You did it as a method to keep the air from getting in – resulting in moisture creation during the cooler months.
To de-winterize the fuel system, you first need to inspect the boat’s fuel line; make sure that there aren’t any cracks there. Due to the low temperatures usually occurring during winter, it might be very easy for them to crack. After all, they are made from rubber.
If you have the same fuel filter that you did last season, then you might want to change it. Also, if you left the gas tank packed with fuel but did not add the stabilizer, you might want to drain everything out. At this point, the fuel has certainly gone stale.
When you refill the tank, you might want to add a non-ethanol that has an additive in the mix. This should prevent any damage incurred from the E10 type of gas.
One last thing that can affect the fuel lines when your boat has been stored is rust. If the tank got filled before storage and you haven’t allowed any place for moisture to get in, then this should not be an issue. However, even if the tank itself is safe, this does not mean that the fuel lines are not susceptible to rust.
8. Check the Exterior of the Boat
You’ll be surprised to find out just how many boats sink as a result of something happening to the hill of the boat. It may have looked perfectly fine when you stored it, but this does not mean that something could not have happened to it in the meantime.
This is why, as part of the de-winterizing process, you might want to check its outside for any surprises. This includes any random cracks, along with missing gauges. Sometimes, you might need to hire some expert help to get a second opinion. They might notice some things that you originally did not.
9. Check for Worn Belts
Your boat has various belts, which is why it is essential that you also check them during the de-winterizing process. After all, they are made from rubber – which means that when they become exposed to the low temperatures of winter, they might get damaged. Look near the pulleys and see if there is any soot; this way, you will know whether your boat needs a replacement or not.
10. Check the Distributor
During winter, the distributor is very likely to corrode. This is something you cannot help – but you can remedy it. All you have to do is clean it up a bit as you are de-winterizing your boat. With the good cleaning supplies, you should be able to bring it back into shape in no time.
First things first, you may want to take off the distributor cap, giving it a thorough clean. Once you’ve cleaned up everything nicely, make sure that every connection has been hooked up tightly. Bear in mind that if the distributor seems too corroded, you might want to consider changing it instead. It might be a better alternative to having your boat break down in the middle of nowhere.
Final Thoughts
De-winterizing your boat should be no different than your regular maintenance check. Since your boat has been sitting around for a while, you’ll need to clean it up and replace everything that is not in order. This way, you should be able to steer clear of any issues.